Intro #
All I wanted in this lab was to set up a pfSense firewall and test some outbound ACLs to replicate an issue I’d been dealing with. Quick and easy: 2 VMs, one pfSense and one client. The idea and the end result were trivial.
But the path to get there? Not so much. I didn’t have my computer, and I wasn’t near my homelab…
I ended up stitching together Proxmox bridges, a Cloudflared proxy tunnel, and nesting Tailscale. Pulling some dusty tricks I had under my sleeve. The journey turned out to be far more interesting than the destination.
So this post isn’t a Proxmox/Tailscale/Cloudflare/pfSense tutorial, much less a deep dive into firewall theory. It’s more of a lab story; a homelab “adventure” about the process, the mindset, and the small tricks I picked up along the way. I’ve added some technical details where I felt it necessary, but the focus is more on the experience.
If you’re here for:
- Ideas for similar deployments, or
- Inspiration for handling remote access in your own setups,
then you’ll probably find something useful.
Project outline #
I needed to deploy the following infrastructure:
- A VM running pfSense.
- A second VM simulating a production server, where I’d configure outbound ACLs or firewall rules.
- Both running inside my homelab Proxmox server.
But…
I wasn’t at home, and I didn’t even have my main laptop with me. That’s where the fun part began.
The project itself was straightforward, but the circumstances made it very interesting to me. I had to figure out how to build this environment remotely, with only what I had available at the time. And honestly, figuring it out is half the fun. Isn’t it why most of us get into this field?
So I spun up a Debian VM on the laptop I did have, installed Tailscale there instead of on the host, and used that VM’s browser to reach my Proxmox server (Or cluster). From there, I started with the actual build: one pfSense VM and one client VM.
Lab Inception #
Halfway through, it hit me just how nested this setup had become, and that realization made the project far more fun than the checklist I started with.
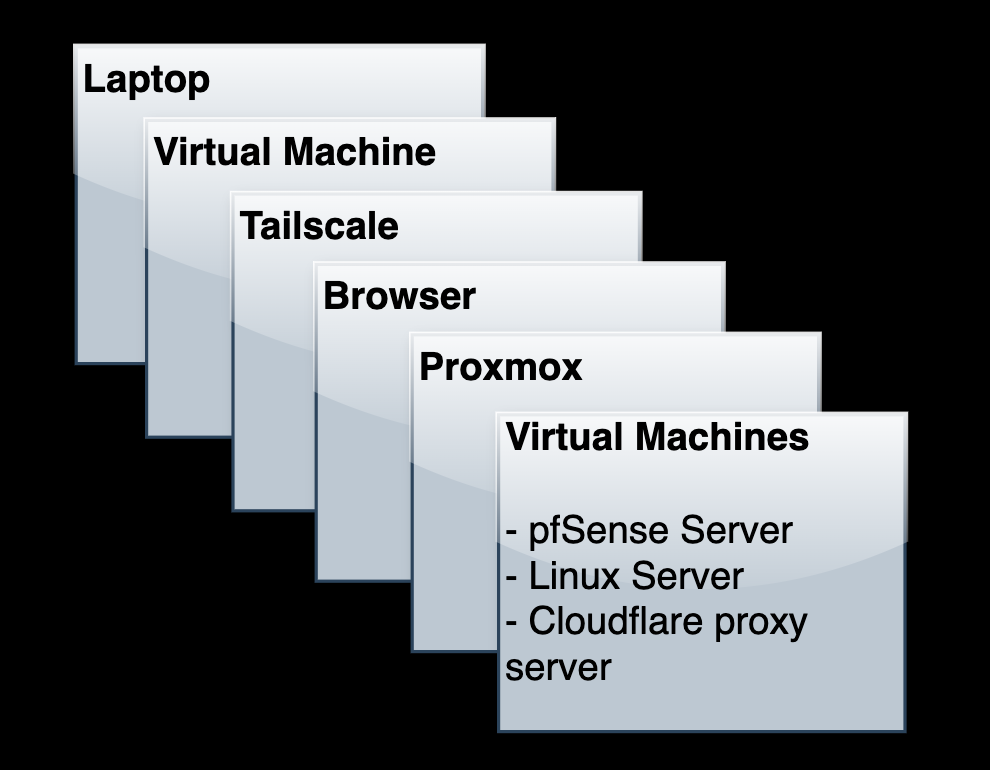
I was accessing Proxmox remotely over Tailscale, spinning up VMs inside it, and then reaching pfSense through a client VM inside that environment. A VM inside a server, reached from another VM, far away from my homelab.
It was like the movie Inception: layers inside layers. And oddly, my motivation skyrocketed. It was the most exciting boring lab I’ve ever done.
I’ll describe the process of how I connected to my remote homelab, and also explain some configurations and maneuvers that I found relevant and interesting for this post. So let’s get started.
Phase 1: Remote Access with Tailscale #
I needed Tailscale in order to access my Proxmox server remotely, so I spun a Debian Linux VM in the laptop I had available. This way, I could work comfortably in this Linux box without cross-contamination (Installing Tailscale, adding SSH keys and other components in my host).
I don’t have my proxmox server set up with Cloudflare for remote access (Maybe I will in the future), so Tailscale solved my access constraint. Just accessing my Proxmox machine via my browser, through Tailscale.
Done ✅
I write often about using Tailscale, which I’ve found one of my core, favorite “platforms” for networking. This isn’t a post about Tailscale, but, in a nutshell:
What Tailscale does, is set up Peer to peer Wireguard tunnels between our devices without managing any VPN server. It’s a VPN under the hood, but without the management overhead (Tailscale uses a pretty complex and clever technique called NAT Traversal so we don’t need to do any port forwarding, opening ports in our Firewalls. Just 2 computers with internet access and that’s it). There’s a lot more than that, but this quick explanation covers for 90% of Tailscale’s use cases.
Phase 2: pfSense + Proxmox Networking #
Once into Proxmox, the goal was simple: Have a pfSense VM, and a Linux VM as its “client” to do my ACL tests. The question was how to actually do that inside Proxmox. I’ve always wanted to virtualize Firewalls like pfSense, OPNsense, or even Sophos XG and similar, but have never had the need for it, until now.
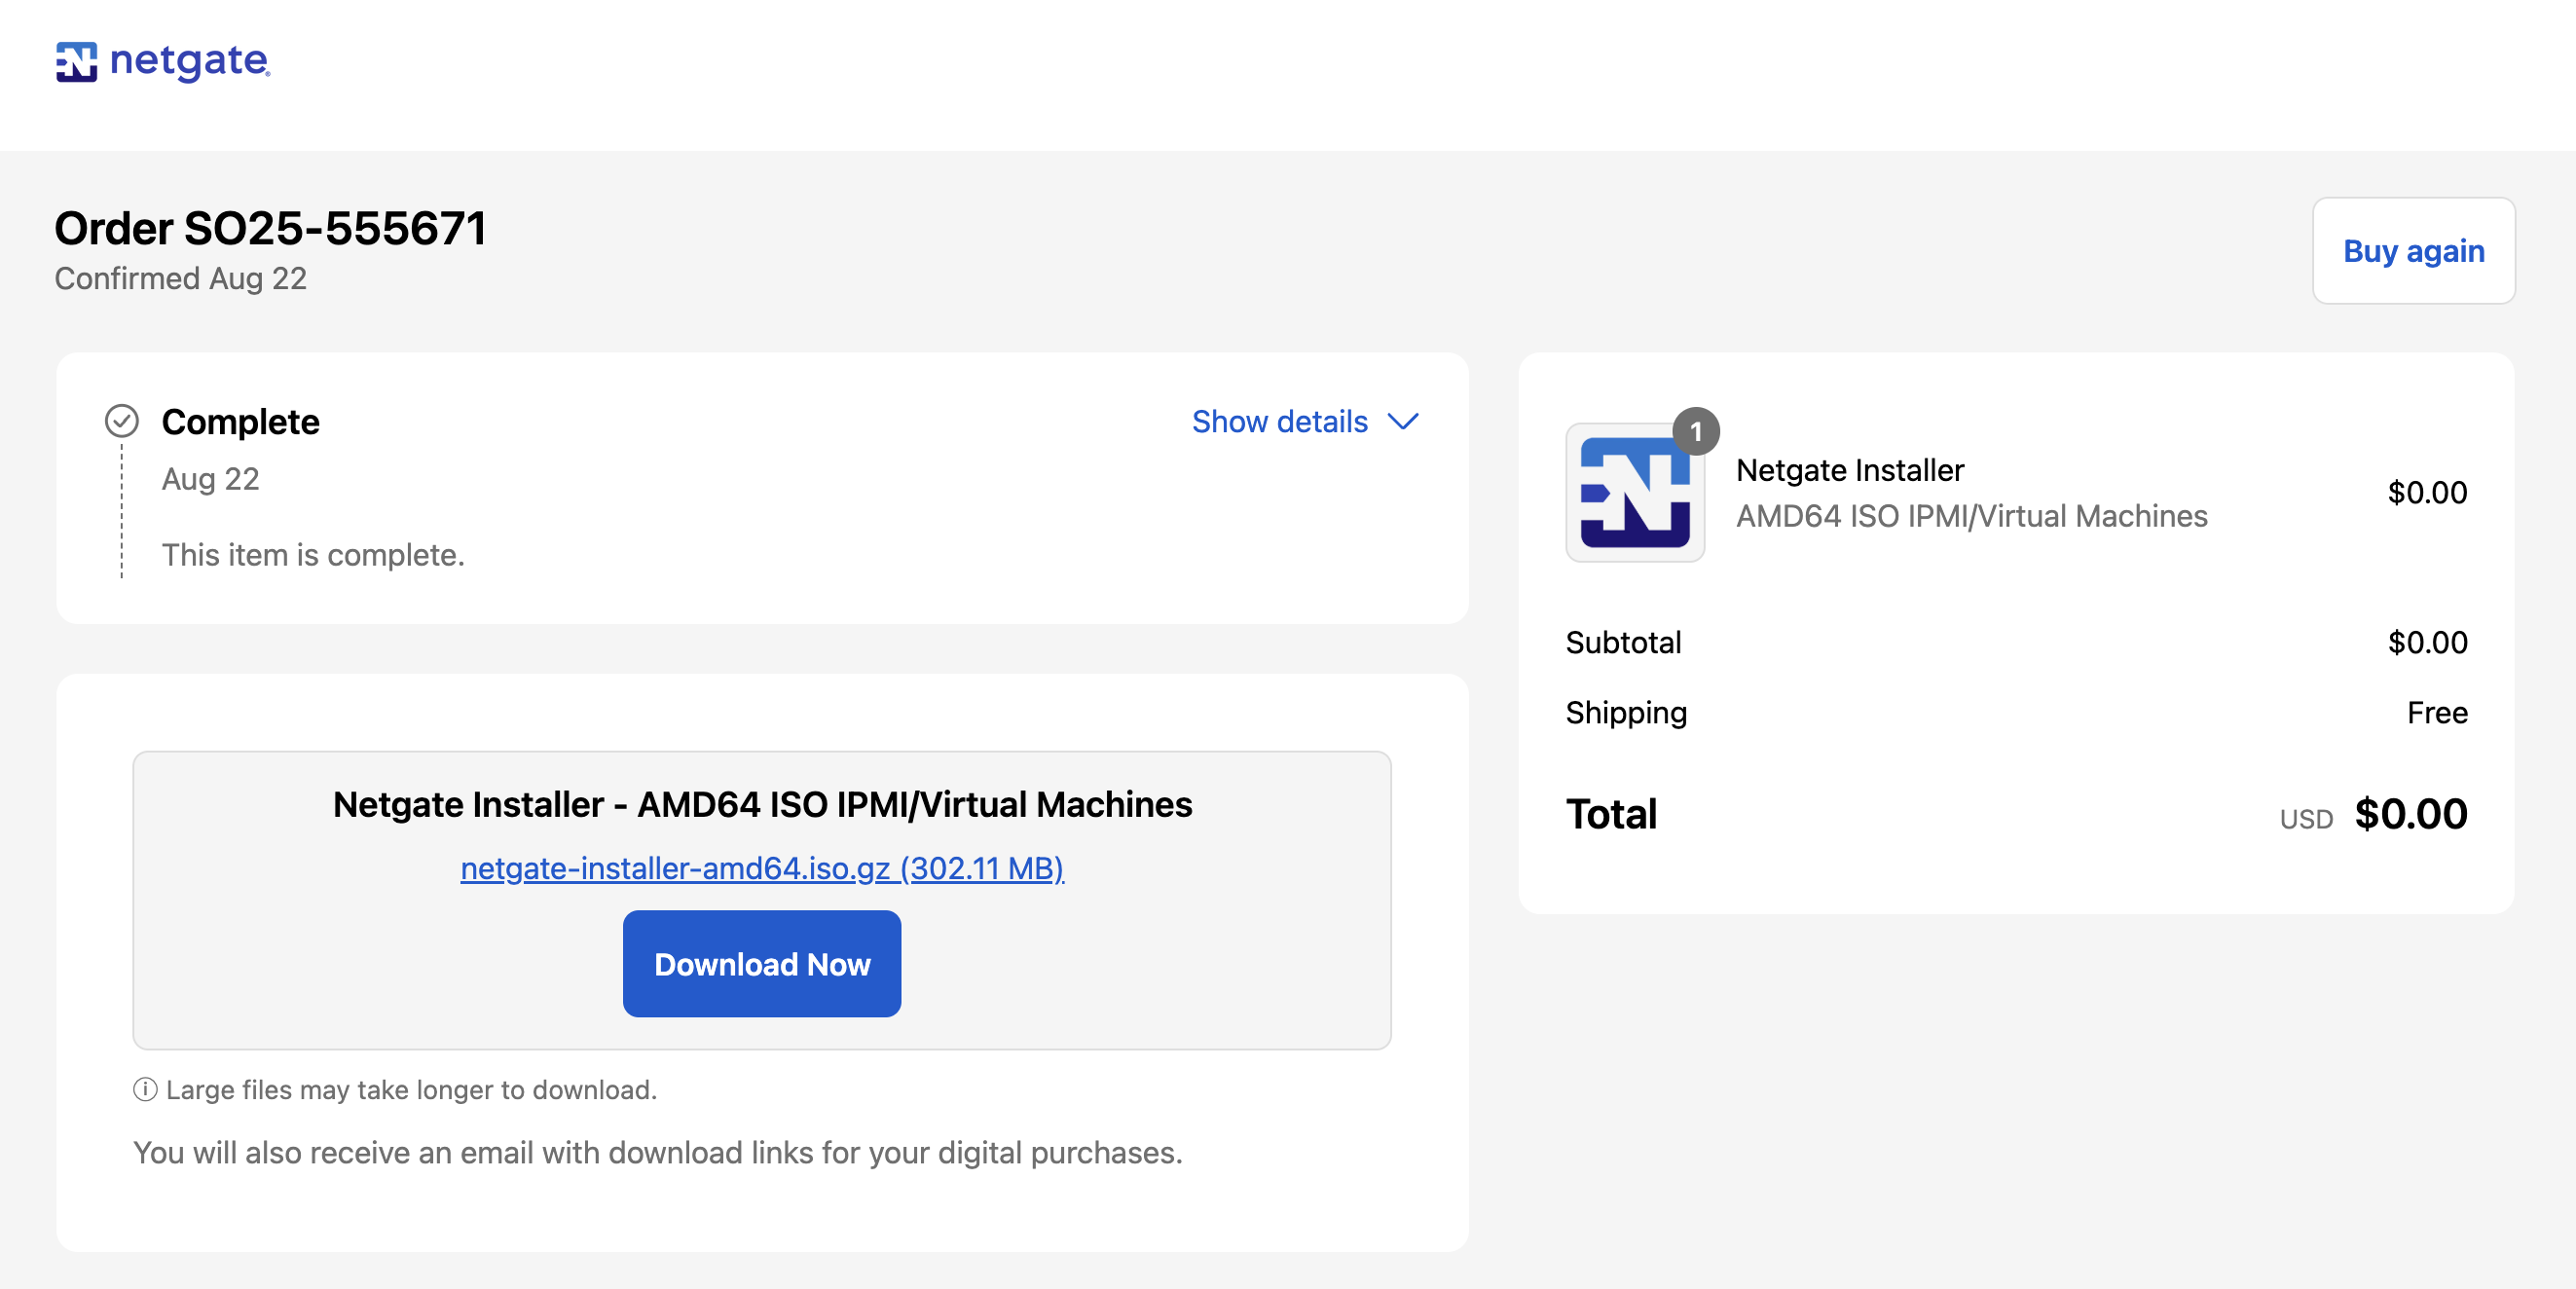
Quick Proxmox pfSense setup: I signed up for a Netgate account, and got the download ISO for Virtualization. Since I was in a remote computer, I needed to download it from my Virtual Machine. Then, already logged into Tailscale, I can just set up a quick HTTP server with python and “pull” the ISO file from the Proxmox host.
- Download Netgate installer,
- Once downloaded, set up a quick http server on the host machine:
cd $HOME/Downloads/

python3 -m http.server 80
- On Proxmox (SSH), just download the gzip archive from there:
wget http://<TAILSCALE_NODE_IP>:80/netgate-installer-amd64.iso.gz -O /mnt/<ACTUAL_DRIVE>/template/iso/netgate-installer.iso.gz

gzip -d /mnt/<ACTUAL_DRIVE>/template/iso/netgate-installer.iso.gz

rm /mnt/<ACTUAL_DRIVE>/template/iso/netgate-installer.iso.gz
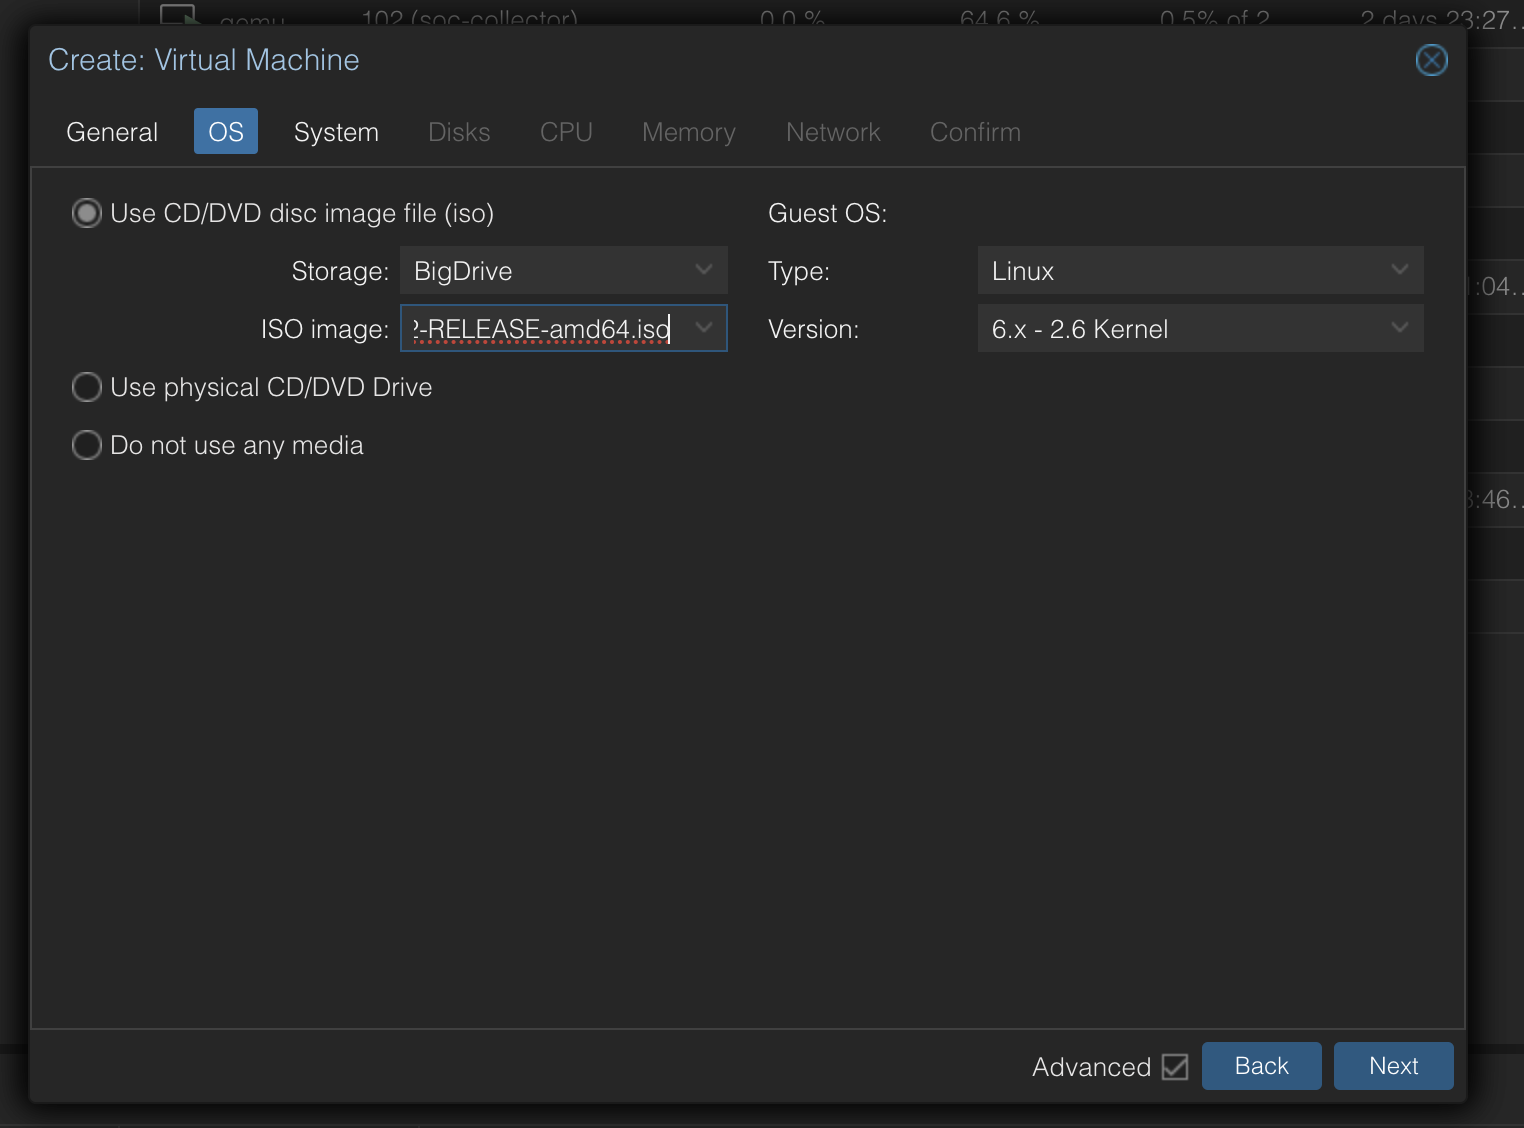
Then, on Proxmox, just create a VM with this ISO:
For this specific scenario, I am using 2 Networking interfaces for the proxmox VM:
- WAN interface: “vmbr0” - Which is the default Proxmox Linux bridge
- LAN interface: “vmbr10” - I ad-hoc created this bridge, which is basically a Switch for pfSense:
- Nodes > Node > Network > Create > Linux Bridge
- Everything will be empty (No IP, no Gateway; pfSense will use this bridge interface for clients at the LAN side)
This was a bit confusing because of its logical classification. But basically:
The pfSense WAN interface (vmbr0) is actually the Proxmox LAN network; “it’s just another host on the LAN.
For the pfSense Firewall “client”: A little bit of back and forth for setting up pfSense and the client VM to be an actual pfSense client, dealing with Linux NetworkManager, figuring out DNS (Which wasn’t relevant for my lab so I ended up doing just DNS traffic forwarding to Google’s 8.8.8.8 and Cloudflare’s 1.1.1.1), and making sure the client VM had internet access. Nothing too crazy.
Done ✅
Phase 3: Making pfSense Comfortable with Cloudflared #
…Or “Escaping inception”
The way to access pfSense at first was a pain. I had to:
Laptop → VM → Tailscale → Browser → Proxmox Web UI → Proxmox VM's Console → VM Browser → pfSense Web UI
- Use my host’s VM,
- Access Proxmox via its browser,
- Access the Firewall client via Proxmox VM Console,
- Access pfSense Web UI through this VM’s Browser…
By default, pfSense’s admin UI is only accessible through its LAN network. I was about to work on this UI quite heavily for hours, so I thought it might be a good idea to make it accessible from anywhere, including my Laptop host. The “inception” part was awesome, but a little bit painful (Weird clipboard issues with NoVNC, Keyboard layout differences between Operating Systems, lag…).
My future me would thank me for setting up a direct access to pfSense’s Web UI…
I’m pretty sure there’s a way to access pfSense from WAN, which is my homelab LAN but I still wanted direct access without any abstraction.

The answer was Cloudflare Access . What it does, is create a reverse proxy from a host with Cloudflared (“Cloudflared”, as in “daemon”) installed and configured, to “expose” it through Cloudflare’s Edge infrastructure. Similar to Ngrok (You hackers know that), but more “permanent” for cases like this, and more private (I “hid” pfSense’s public HTTP front behind an MFA screen). This cloudflared configuration allows Cloudflare to “point” to any desired HTTP/S server inside our network, to be “exposed” via Cloudflare’s infra itself without needing any port forwarding, handling TLS certificates, etc. All served and cached in Cloudflare’s infrastructure. I am very familiar with the process and I like it, so I guess it was on top of my mind, and I also wanted to get a little bit fancy.
So I spun up a tiny second server, which would act as a reverse proxy client that runs Cloudflared.
The only prerequisite for this, of course, was that I needed pfSense to be running and have internet, as well as the (now 2) Firewall clients having internet access through it (Else we couldn’t expose anything to the Cloudflare Edge in the first place).
The process for setting it up now is now easier than it used to be; we just need to log into dash.cloudflare.com , set a new tunnel and follow the steps. It used to be more complex, especially for self-signed certificates, but very recently they improved this flow (It takes now 2 minutes instead of 10-15):
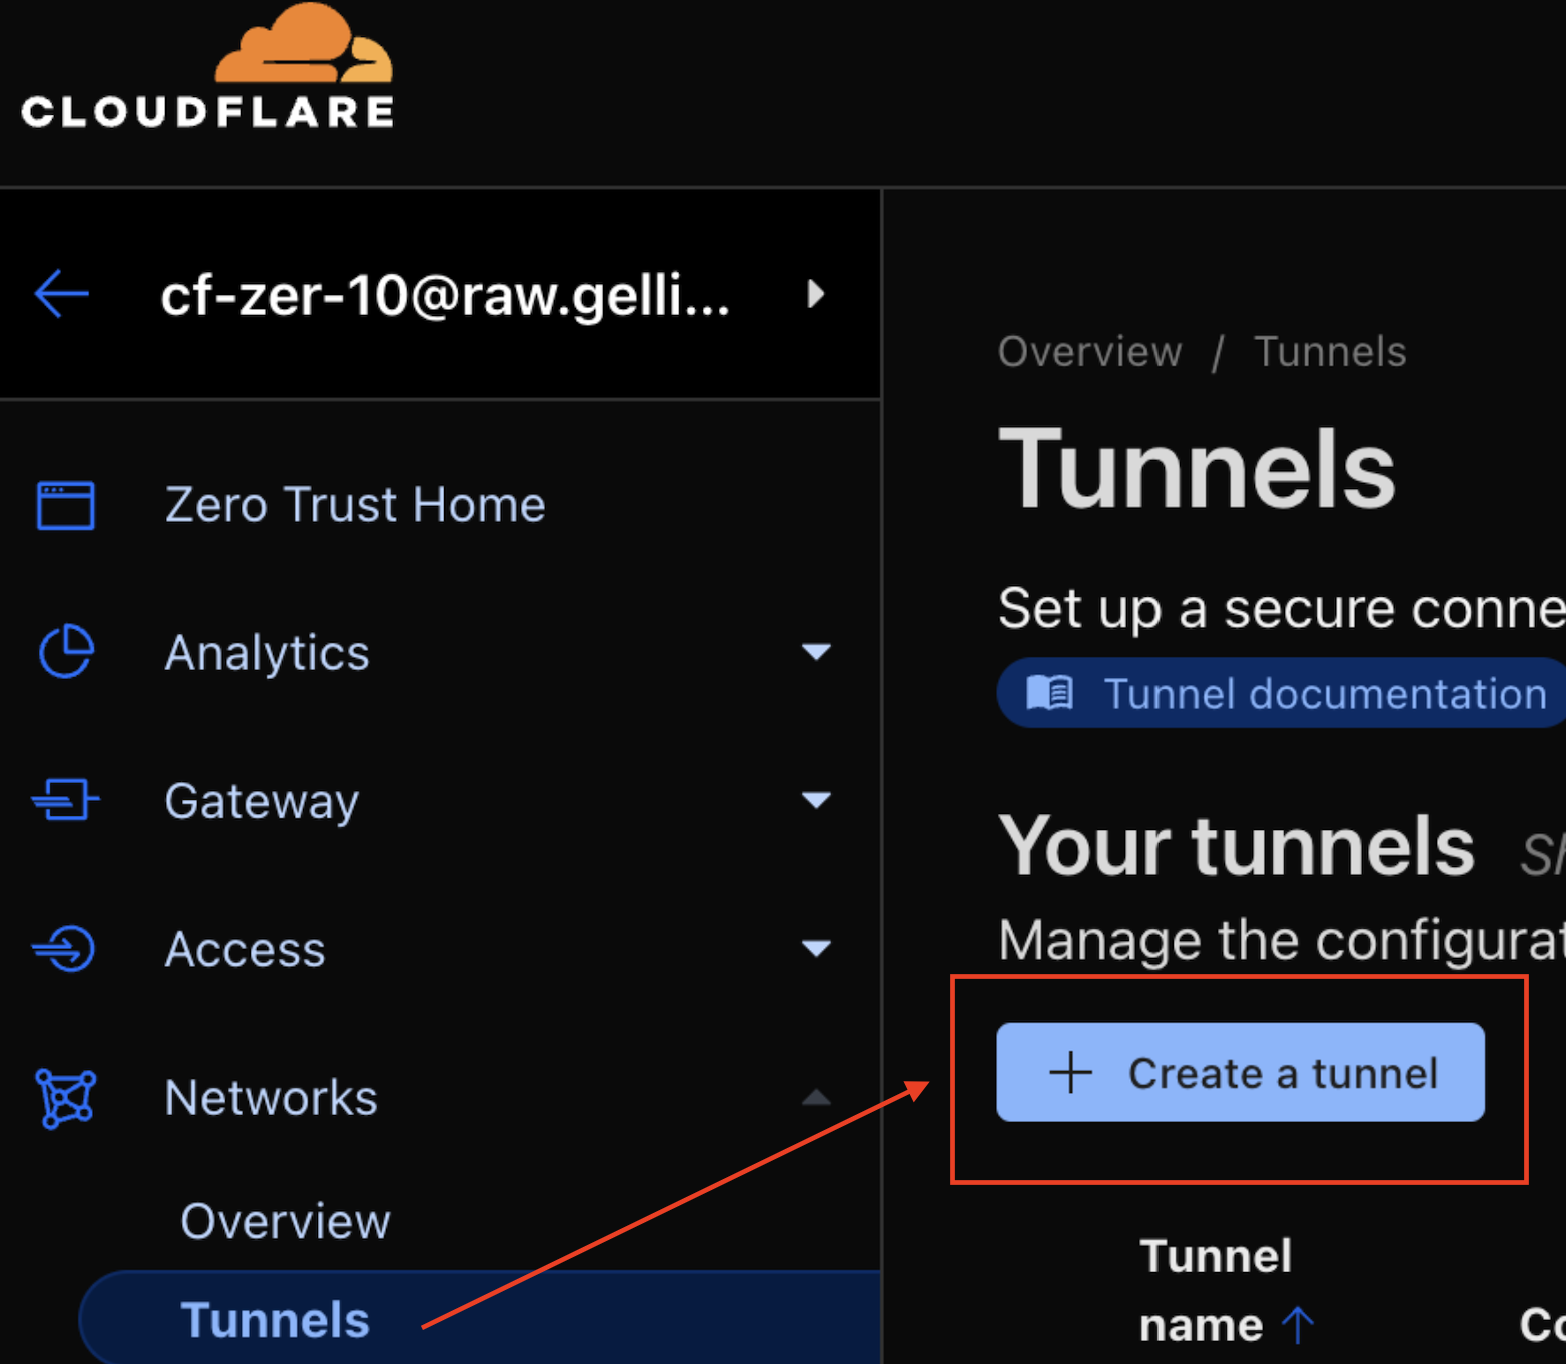
Following the steps, we install cloudflared (daemon) on our Linux VM, set up a policy, and other configurations.
Once cloudflared is running in our VM, and authenticated (And visualized in Cloudflare Zero Trust dashboard), we can (SHOULD) “add an app to it”. What that means is, we’re hiding our newly exposed pfSense Web UI behind an MFA screen we need to log into.
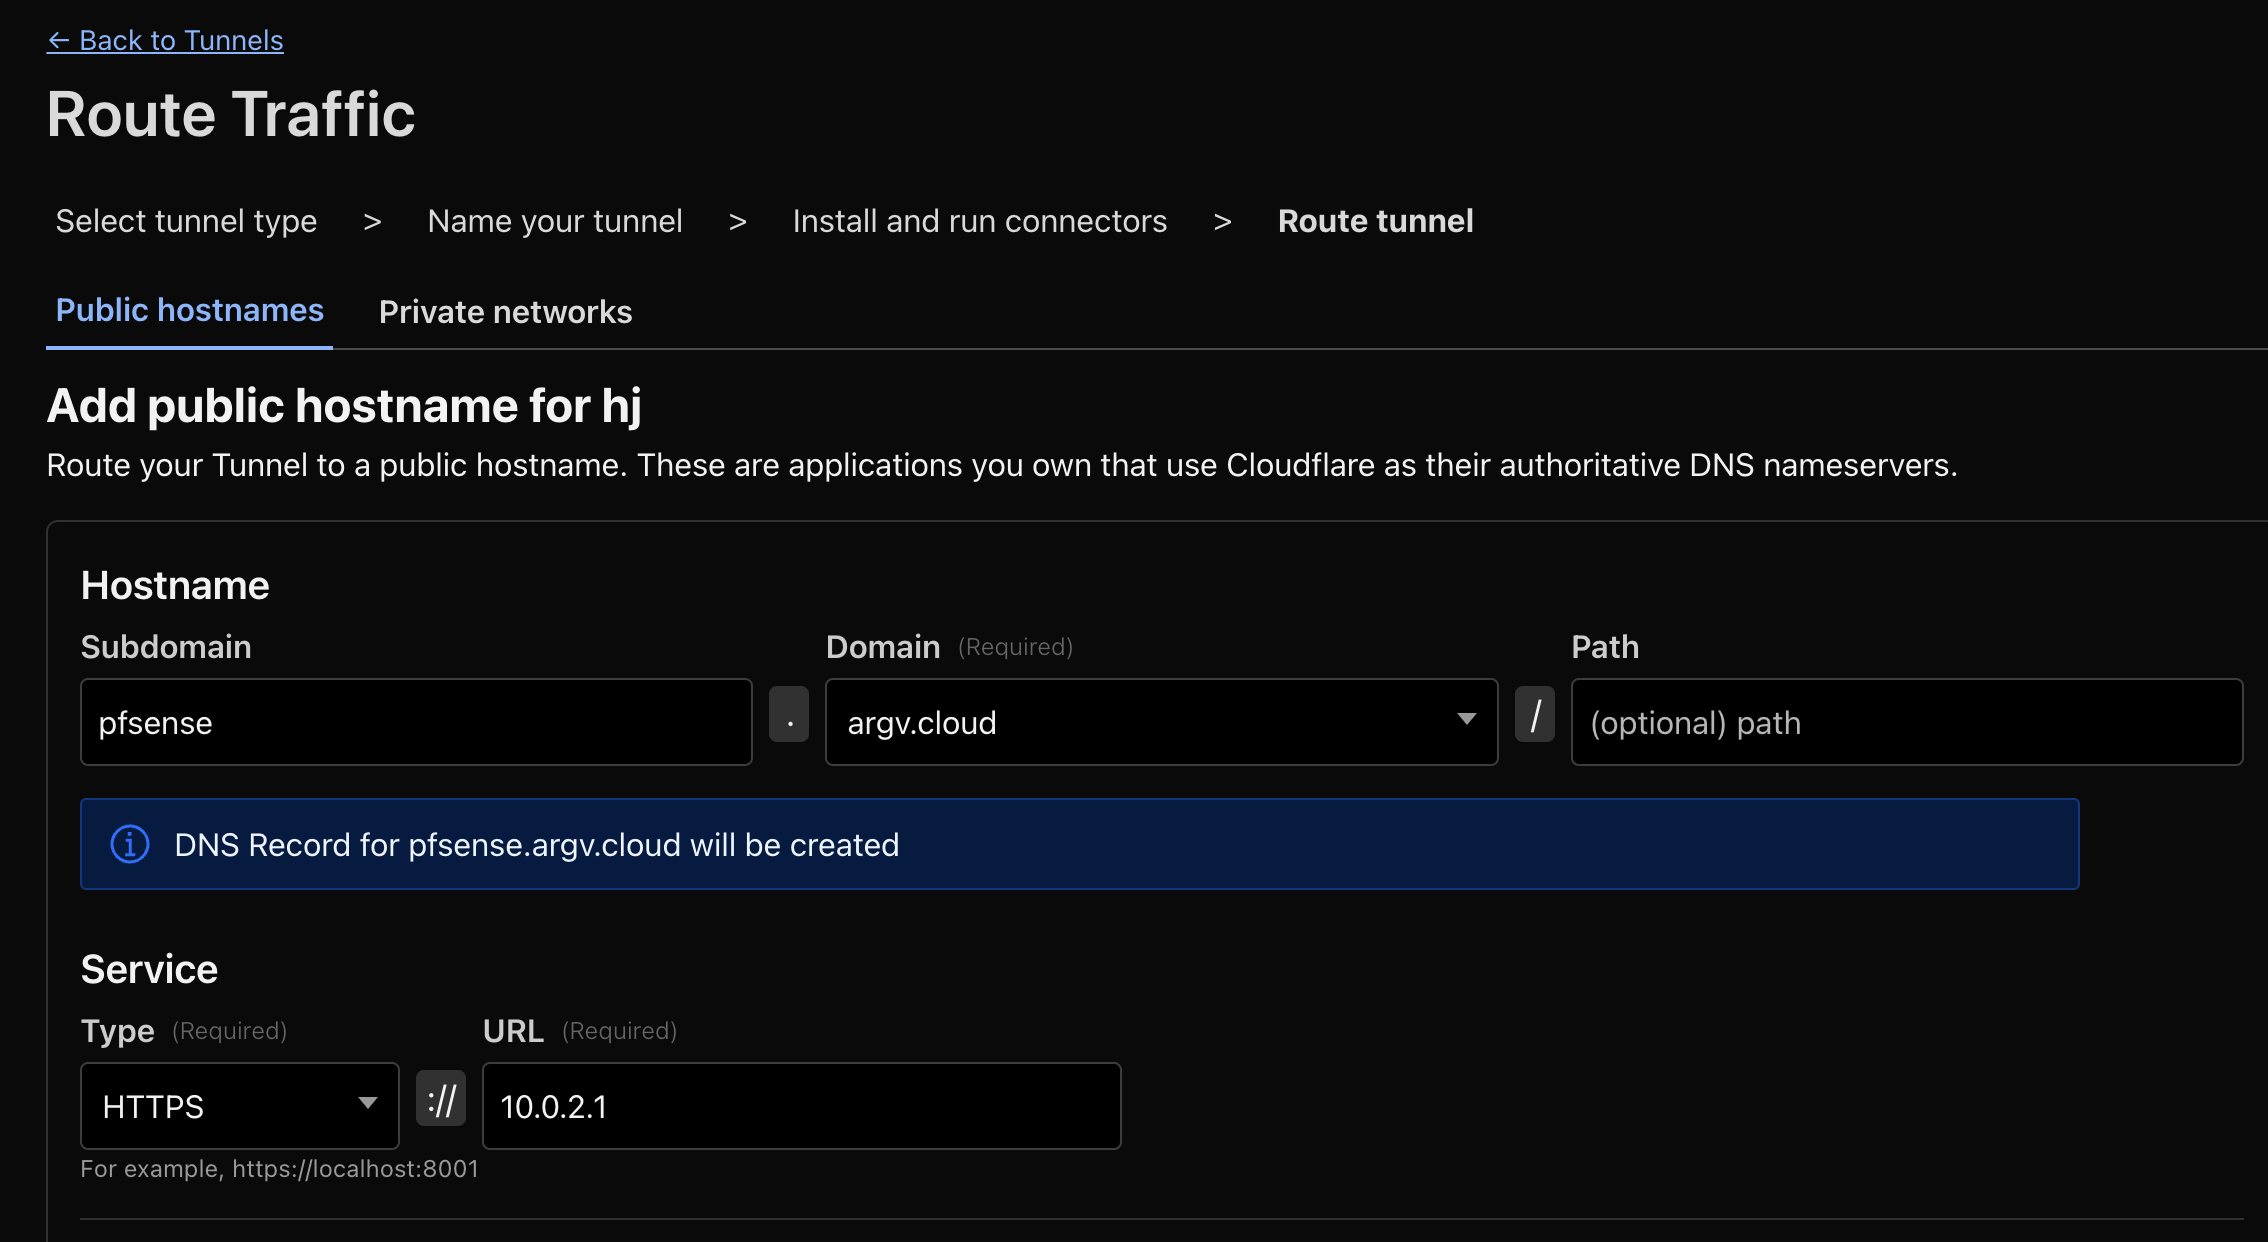
Obviously this isn’t exactly how I set it up at argv.cloud and the subdomain I’m showing on the screen, but it’s the same process. I just changed the URL to be the pfSense’s LAN IP (Which happens to listen on port 443, https, self-signed). My newly installed VM, which will act as the “Cloudflare tunnel gateway” (At least that’s how I conceptualize it), will be the one exposing traffic to Cloudflare’s edge. It will use cloudflared (daemon) to point this traffic to pfSense’s LAN IP, on port 443, https.
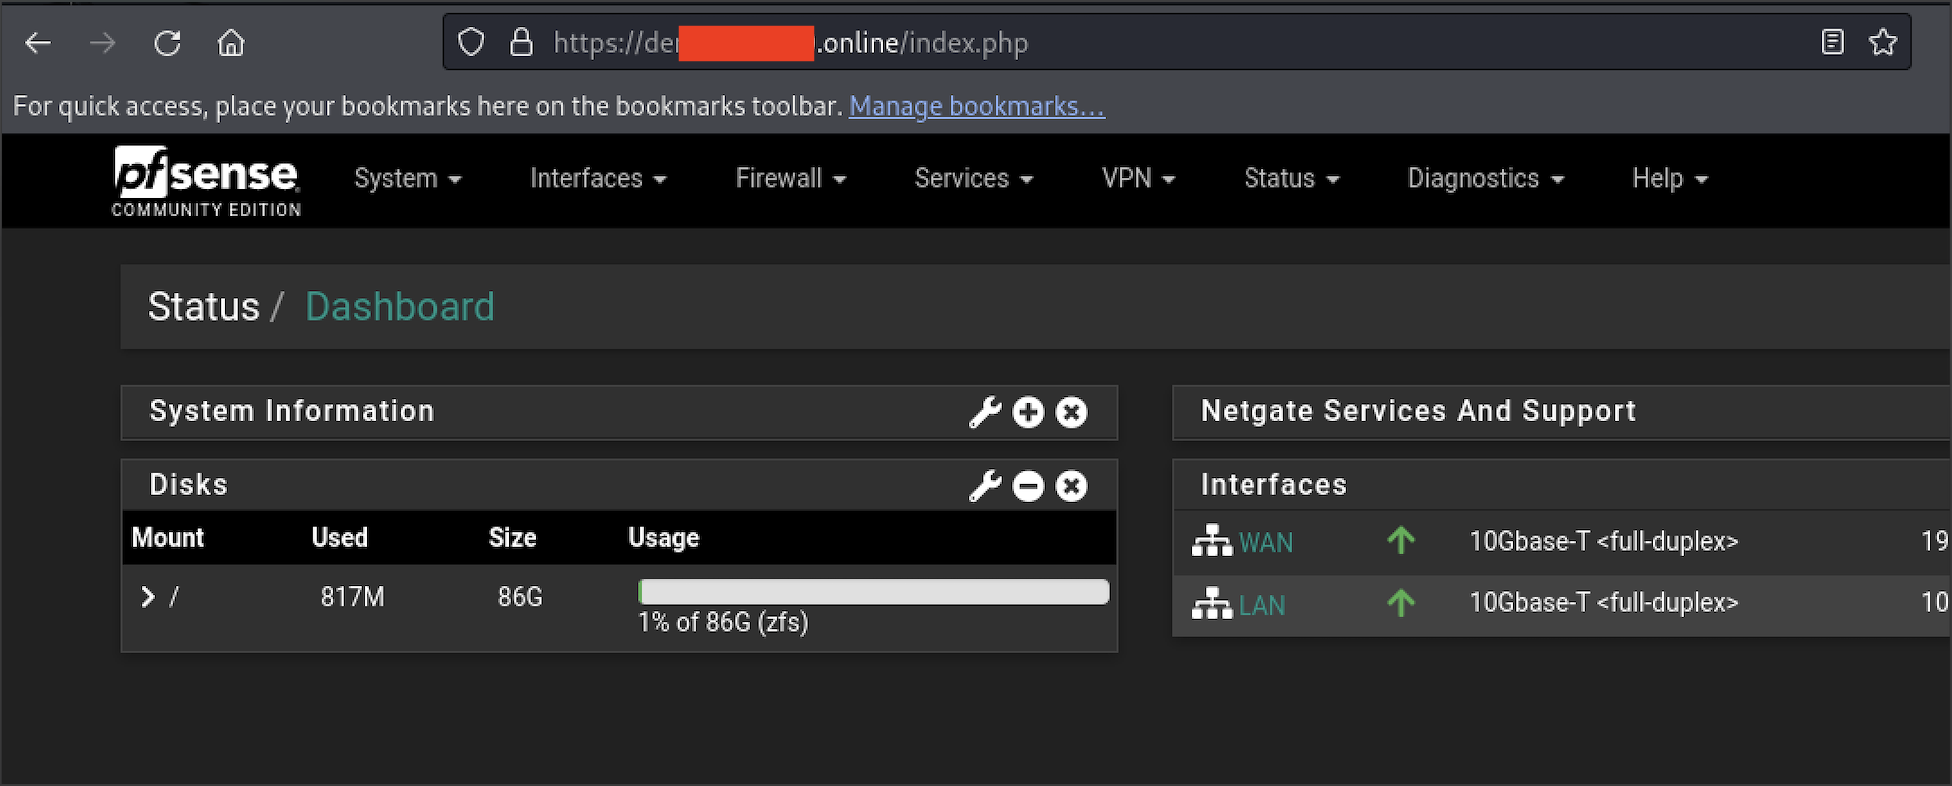
And we’re live:

Based on the policy I have set up for this lab, I can enter with my email to access pfSense.
This isn’t a blog post about “How to set up Cloudflare Access for Zero Trust”, but you can check the process in their original documentation (It’s fairly simple to set up and extremely powerful once you get the core idea):
There is a weird issue about pfSense accepting connections from an HTTP referrer. The thing is, the referrer, if we’re using Cloudflare Access, will be our-network.cloudflareaccess.com after we log in. We can fix this on pfSense UI.
Cloudflared is weird to wrap our heads around at first, but fairly straightforward once it makes sense. Here’s exactly what happens under the hood:
- Cloudflared (Process in our VM, authenticated to Cloudflare) establishes outbound-only connections to Cloudflare’s edge network, and Cloudflare Edge proxies incoming requests for your subdomain through that tunnel back to the target service you defined (e.g. HTTPS app running locally. But in this case, we established the target service as “another VM’s https:// web interface”).
- The Linux server in this case, is a reverse proxy client.
Having direct access to my remote pfSense Web UI, I had a very comfortable way to work in it (And private, and fancy, with my own subdomain and TLS and everything).
Done ✅
Phase 4: Tightening ACLs (The Actual Goal) #
The core idea or purpose for this lab, was to test some specific whitelists on a firewall’s ACL on the outbound. Mainly:
- Debian’s APT repositories (Of course),
- NTP Pools,
- DNS (For this lab, DNS was not relevant, so just decided to route all DNS to Cloudflare’s 1.1.1.1, Quad9, etc.),
- Tailscale,
- Cloudflare (Specific for my lab project)
- The specific piece of software I needed to triple check on its outbound Network connections
Before tightening up this ACLs, I needed to figure out the whole host/protocol/port list, so that when I close it down, my servers do the minimum necessary for this lab and I don’t get knocked out of my lab.
It’s important to notice that pfSense is a Stateful Firewall, so even if I burn the bridges by removing all Firewall rules and tightening it up, I’ll keep my connections even if my ACLs don’t consider them. This would help if I missed something in my list. The most important ones, of course, are Tailscale, and Cloudflare. So here it goes..
Tailscale ACLs #
This one was a rabbit hole. I have a custom set of DERP relay servers in my Tailnet, and the purpose is so my Tailnet doesn’t use EVERY possible region, but only the relays closest to the networks I use Tailscale on.
By the way, the way to trim down the DERP servers list as follows:
- Figure out the region codes for Tailscale by running:
$ curl -s https://login.tailscale.com/derpmap/default \
| jq -r '.Regions | to_entries[] | .value | "\(.RegionID)\t\(.RegionCode)\t\(.RegionName)"'

1	nyc	New York City
10	sea	Seattle
11	sao	São Paulo
12	ord	Chicago
13	den	Denver
14	ams	Amsterdam
15	jnb	Johannesburg
16	mia	Miami
17	lax	Los Angeles
18	par	Paris
19	mad	Madrid
2	sfo	San Francisco
20	hkg	Hong Kong
21	tor	Toronto
22	waw	Warsaw
23	dbi	Dubai
24	hnl	Honolulu
25	nai	Nairobi
26	nue	Nuremberg
27	iad	Ashburn
28	hel	Helsinki
3	sin	Singapore
4	fra	Frankfurt
5	syd	Sydney
6	blr	Bangalore
7	tok	Tokyo
8	lhr	London
9	dfw	Dallas
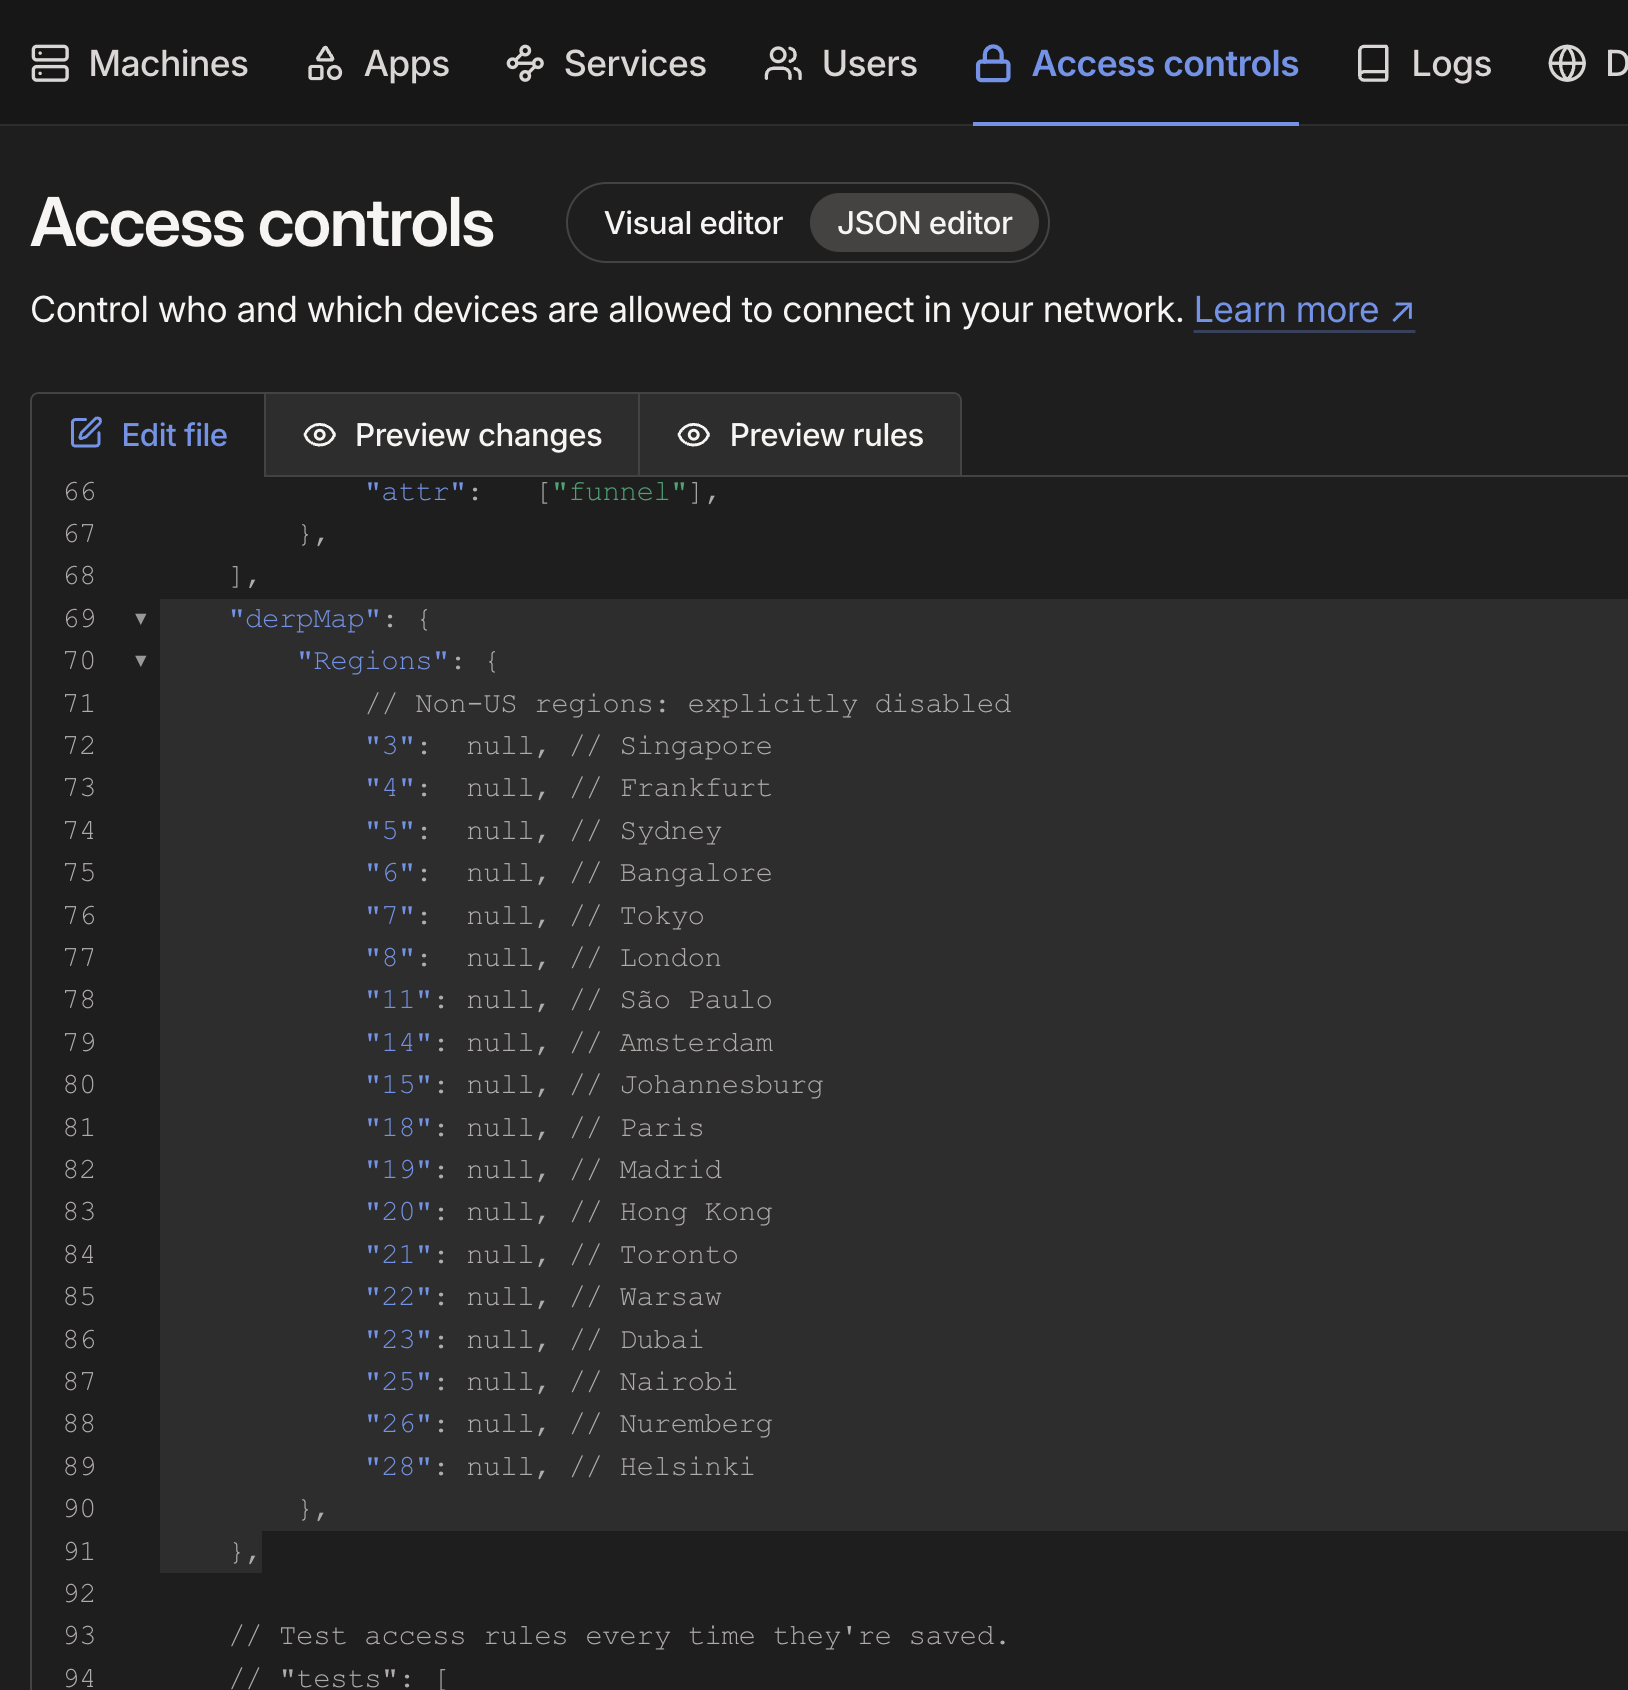
- Then, having the IDs we don’t want, we can block them in our ACLs like this:
- Verify Tailnet is only using the DERP servers we didn’t block:
$ tailscale netcheck

Report:
	* Time: 2025-08-26T01:10:33.410082Z
	* UDP: true
	* IPv4: yes, <some-ip>:27101
	* IPv6: no, but OS has support
	* MappingVariesByDestIP: false
	* PortMapping:
	* Nearest DERP: Dallas
	* DERP latency:
		- dfw: 39.2ms  (Dallas)
		- den: 53.3ms  (Denver)
		- ord: 58ms    (Chicago)
		- mia: 62.8ms  (Miami)
		- iad: 66.6ms  (Ashburn)
		- nyc: 66.7ms  (New York City)
		- lax: 69.3ms  (Los Angeles)
		- sfo: 76.7ms  (San Francisco)
		- sea: 86.7ms  (Seattle)
		- hnl: 124.9ms (Honolulu)
We have only a handful of DERP server hosts to whitelist. We just need a list of DERP server hosts, assigned as derpN-all.tailscale.com where N is the region ID we want. Reading the official Tailscale documentation:
https://tailscale.com/kb/1082/firewall-ports
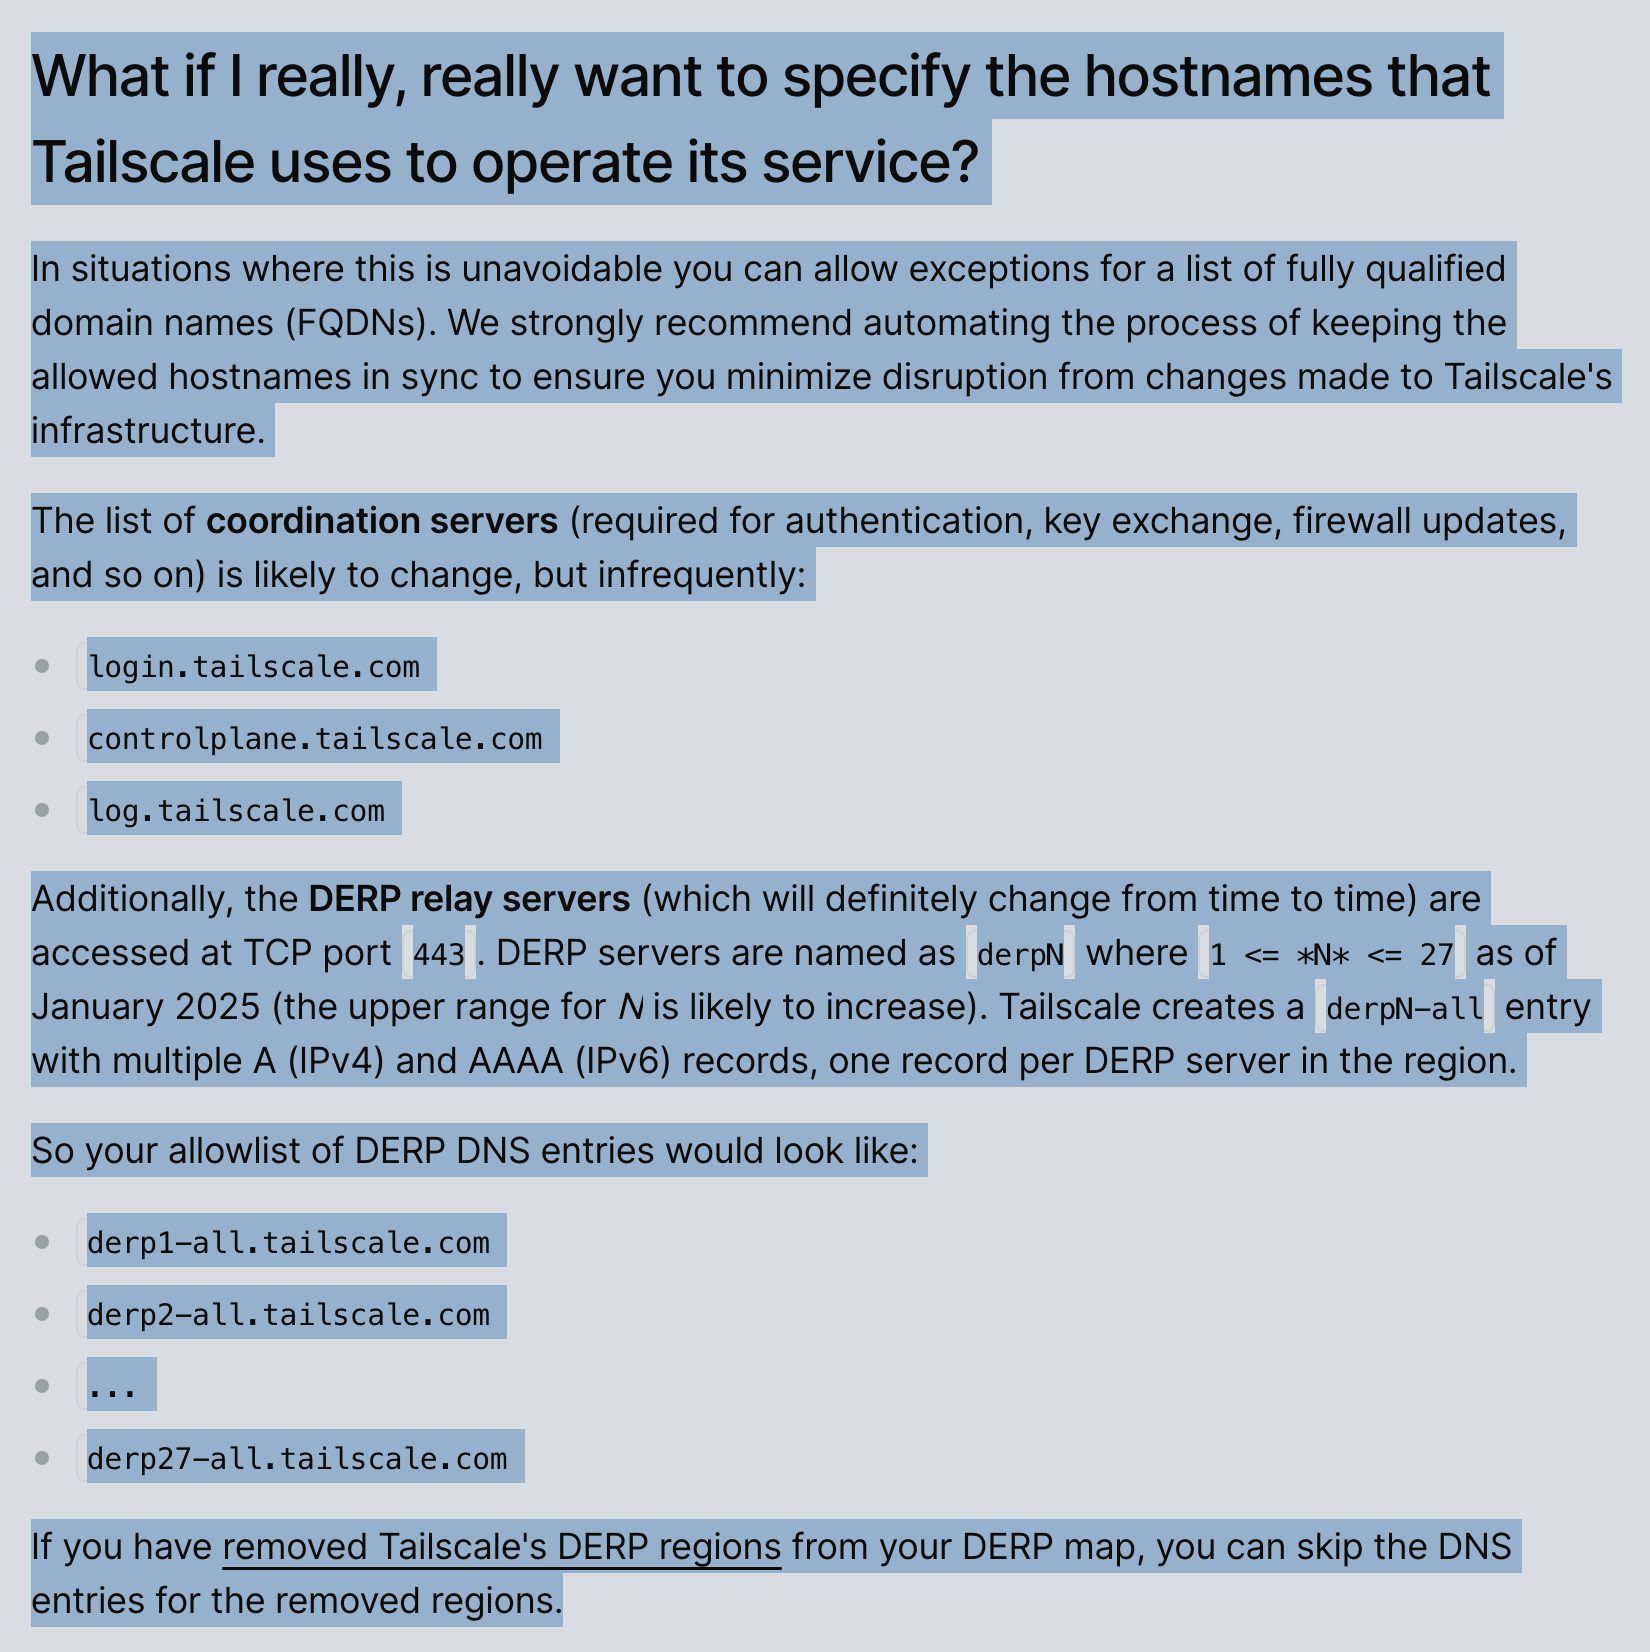
We can trim down the hosts, ports and protocols we need to allow on the outbound. Namely:
- Tailscale Control:
login.tailscale.com, controlplane.tailscale.com, log.tailscale.com - DERP: (It’s just this particular example; you’d need to cherry-pick the ones you would actually need)
derp1-all.tailscale.com, derp2-all.tailscale.com, derp9-all.tailscale.com, derp10-all.tailscale.com, derp12-all.tailscale.com, derp13-all.tailscale.com, derp16-all.tailscale.com, derp17-all.tailscale.com, derp24-all.tailscale.com, derp27-all.tailscale.com - Tailscale Updates:
pkgs.tailscale.com
I didn’t whitelist peer-to-peer UDP (NAT traversal) traffic (:41641 to *:*.), and my Tailscale performance got degraded a little bit, but it was less dramatic than I thought it’d be. I can leave it as is for now.
Cloudflare ACLs #
The set of hosts needed for Cloudflare Access was very straightforward from the official Docs:
region1.v2.argotunnel.com, region2.v2.argotunnel.com, update.argotunnel.com, and api.cloudflare.co
Other ACLs #
The rest was fairly straightforward and “by the book”:
- Debian updates:
debian.map.fastlydns.net, deb.debian.org, security.debian.org, metadata.ftp-master.debian.org - Github (For downloading some packages Tailscale, Bindplane, etc.):
github.com, api.github.com, codeload.github.com, raw.githubusercontent.com, objects.githubusercontent.com, github-releases.githubusercontent.com
By this point, the ACLs were done. A handful of hosts, rules, and defaults. Nothing anyone hasn’t seen before.
The real fun was never the list of domains. It was the “inception” process that led to them: nested VMs, Proxmox bridges, Cloudflared tunnels, Tailscale hops…
That’s where this lab actually came alive.
Reflections: Why the Journey Was Better Than the Destination #
The goal of this lab was boring on paper: just a pfSense ACL checklist, a “to-do” in my week. But the path pulled me into a process that was much more engaging: testing Proxmox networking, tunneling with Cloudflared, hopping through Tailscale, and watching it all click together.
At times, this and other labs have felt more like craftsmanship than just “Dev” or “Ops.”
That’s the hidden value of homelabs. You don’t just tick off tasks. You practice mixing and tying tools together, noticing their quirks. Personally, I love when I’m forced to dig into those quirks. We rarely RTFM , but situations like this make it necessary, and learning how tools behave in combination produces an amazing feeling.
The actual outcome might look trivial, but the intuition you build along the way is what makes these exercises worthwhile.
Sometimes the most exciting labs start with the most boring goals.